The Pretty Penelope Headband ~ tutorial
First thing I want to apologize for the next couple of tutorials my camera is in the shop :( so I have Mr. point and shoot he can't compare to Mrs. DSLR so for now we have blurry not so good pictures of tutorials I really like. Good thing is I should be getting her back today so just a couple of tutorials we have to live with MR. point and shoot!
I'm in the works of something huge if you are on my regular facebook you would already know what i'm talking about but I haven't told anyone else out side of that circle so far. Soon enough EVERYONE will know what i'm doing and I hope you all love it. That brings me to the next couple of tutorials they will be apart of my huge project I have going on, HAIR ACCESSORIES. I did a quick tutorial for each and they don't take long to make at all 5-10 minutes for each headband so off we go...
The pretty penelope headband tutorial

The pretty Penelope headband

Supplies
fabric
thread and needle
scissors
headband
template

template (don't make fun of my lopsided flower in the end it wont matter)

Cut out 8 flowers, I cut 4 at a time to save time!

now you want to stack them in different directions

leave three remaining off, sew an X in the middle of the stack..

now take the remaining three pieces and fold them in four or you can just kind of bunch them up and stitch the bottom of the corner on to the middle of the stack.

then do it to the other two

should look like this, now tie a knot in the back with the thread and cut off
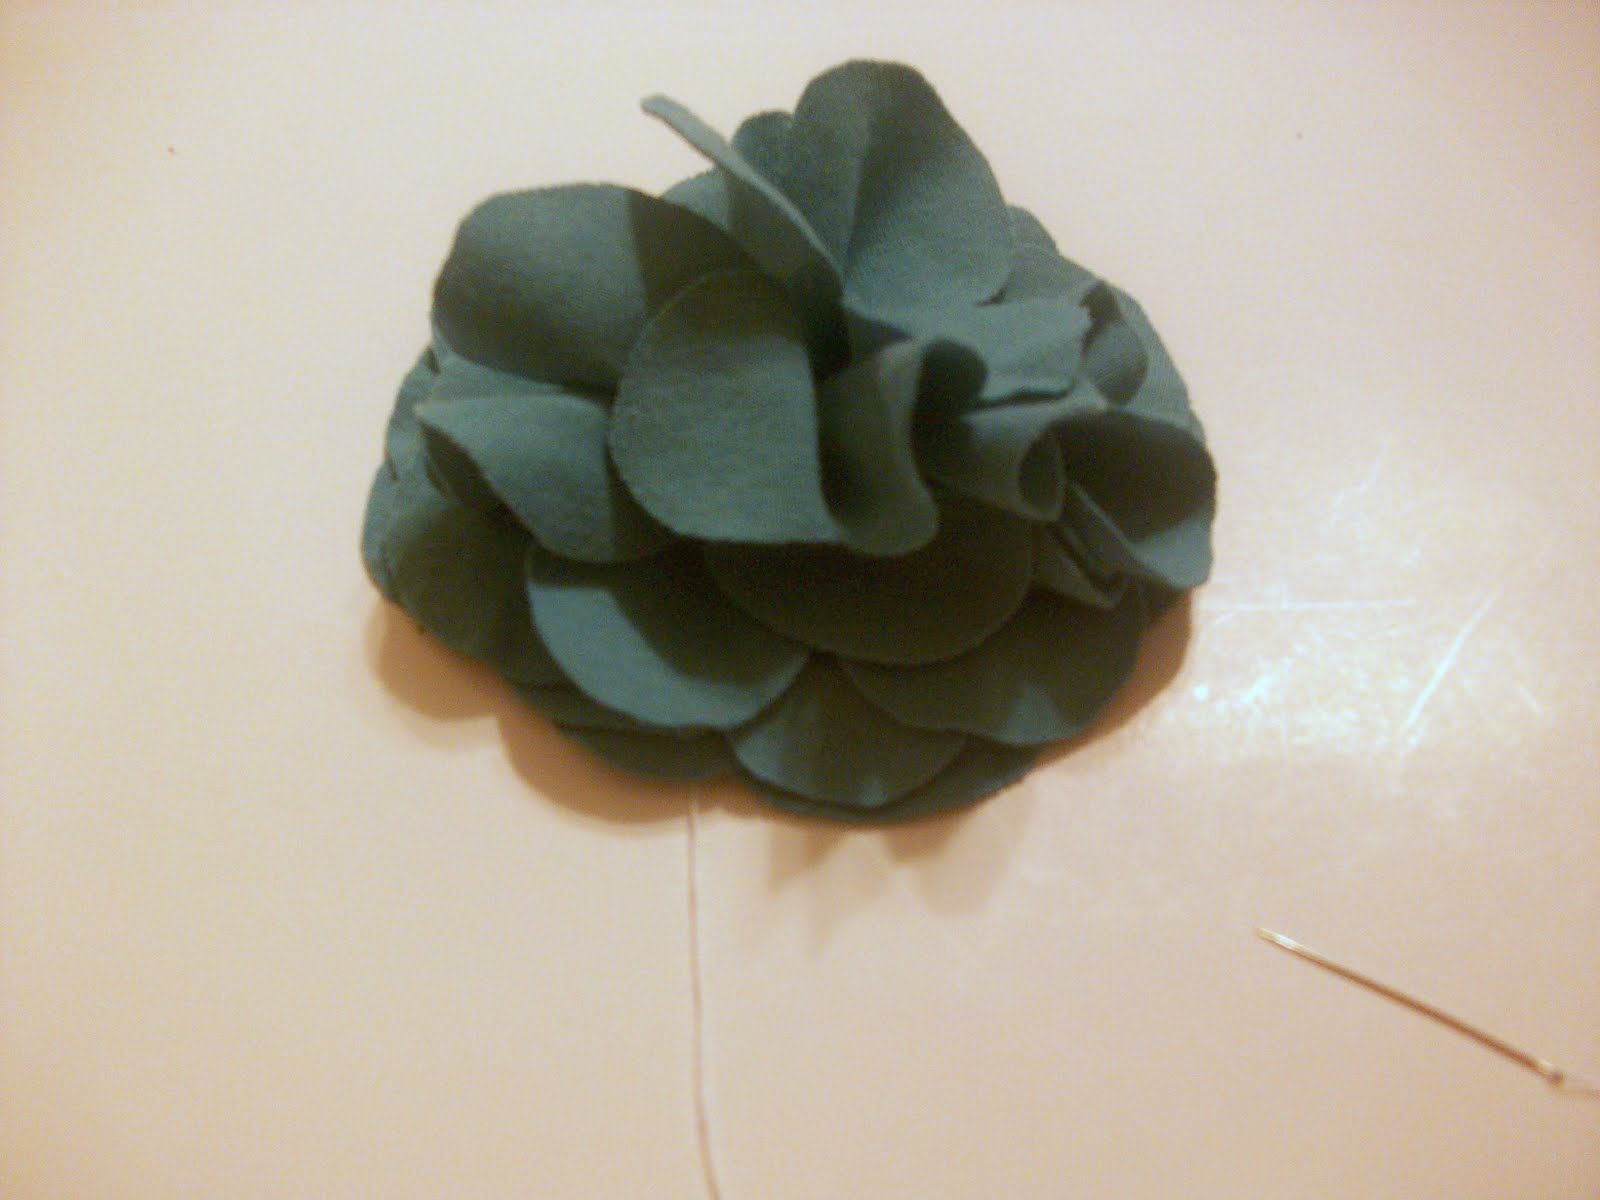
now take those three pieces and ruffle them up so it will look like this

glue your headband on and you are finished, I love how it came out. It looks so much better in really life this camera does not do it justice for sure.
Two more headbands are on their ways :)
Peace Love and Cupcakes
Amanda

Comments
Post a Comment
I love comments so please tell me what you think, it will make my day!