Guest blogger ~ the Shwin's Yahhhh
| So today i'm super excited for my guest I have been following them since the beginning and I litterally go to there blog everyday to see what new fun ideas they have thought up....I couldn't be happier when Shauna said she would love to be apart of my blog, she is soo talented along with her sister, if you have yet to check out their blog Shwin & Shwin its a a must . They do girls clothing, boys, womens, and house decor absolutely love it all Thank you again Shauna I'm thrilled to have you here!!! Here is Shauna  |
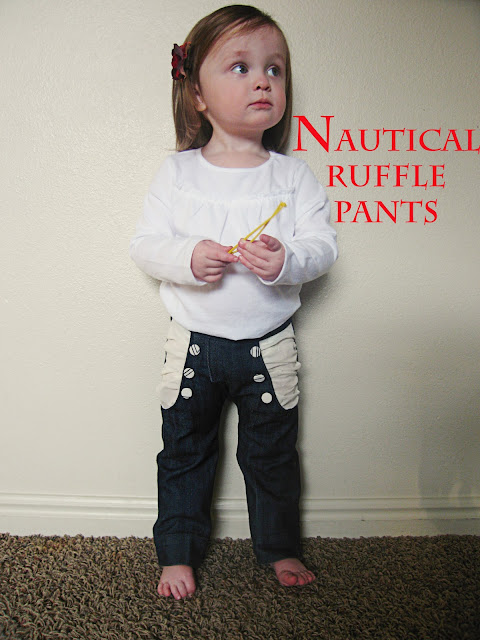
| Hi there! I am Shauna and I blog over at Shwin & Shwin. I LOVE to sew, and it is my main hobby but I don't let many things go untouched and share other projects from time to time. My super busy sister also flashes her crafty self and shares some awesome, non-sewing, non-children tutorials, it's a nice balance. You should come by and say hi sometime! We both love making new crafty friends! Speaking of crafty friends, ins't Amanda creatively awesome? I just love her whimsical designs and darling little girls, it is such an honor to be invited over here today! A while back I made this skirt, and I always wanted to make pants that followed a similar design. I finally got around to it. Just in time for summer, nothing says summer like a little nautical love. So would you like to make some nautical ruffle pants? I promise they are pretty easy to make and a lot of fun! Oh and cheap since I used an old pair of jeans... |
 |
| Then with your front leg piece you will also draw your cut out on the side. |
 |
| Now let's sew shall we? Start by sewing right sides together to sew the facing to the cut out of the front legs. Then turn the facing around to the inside and topstitch in place. |
 |
| Next that ruffle piece. It can just be a rectangle. It needs to be long enough that you can ruffle it and it will fit in the cut out, and wide enough as well. Then Ruffle both ends of the rectangle. |
 |
| Then pin it in place just behind the cut out of the front pieces and sew in place. |
 |
| Then after the ruffle is sewn in place to both front legs sew one front leg to one back leg along the straight side. Do this with both pieces as well. |
 |
| Next fold the right sides together and sew from the bottom hem to the top of the curve. |
 |
| So for the front you should sew the faux fly pieces together as well. |
 |
| Then turn them right side out and it should look like pants. Fold the faux fly over to one side and sew in place. (simple right?) |
 |
| Now for the waistband make a front and back piece that should match the size of the front and back of the pants. The back should be taller than the front. Then sew them together at the sides. |
 |
| Then line the waistband up with the top of the pants and sew in place. |
 |
| Fold the waistband in, and from side to side along the back sew an elastic casing, then put in some elastic and sew it in place at the side seams. |
 |
| Then topstitch down the waistband. |
 |
| Then you have some pants! |
 |
| Lastly I dug through the good old button collection and found some fabric covered buttons with some cool and random stripes on them, I sewed three to each side and done! |
 |
| Now your little one can welcome in summer prepped and ready with nautical looks. |
 |
| and the ruffled piece adds some nice feminine flair... Thanks so much for having me Amanda! Enjoy! |


Very Cute. I love all your designs.
ReplyDelete