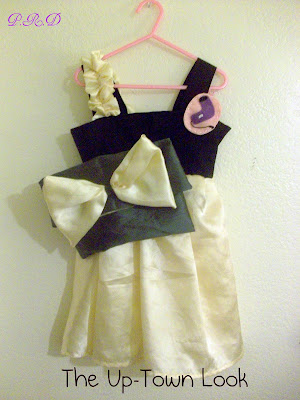
The Up-Town Look; Tutorial
So i'm not sure to put this on my blog but I guess I just will for future references...
Okay it's here, the tutorial I can't wait to show everyone, I'm so excited to be a guest host on Sewing in no mans land. So I would like to for worn everyone there are a couple of things to this outfit so lots of pictures are ahead.. I call it: The Up-Town Look...


Okay it's here, the tutorial I can't wait to show everyone, I'm so excited to be a guest host on Sewing in no mans land. So I would like to for worn everyone there are a couple of things to this outfit so lots of pictures are ahead.. I call it: The Up-Town Look...

I will start with this little dress which is made out of a bed sheet, thats right a bed sheet and a old top of a shirt...

so I took the top of the shirt and measured my little model, pinned to fit and then sewed right down each side. then you just cut of your extra fabric hanging off (the notebook is my drawing of the dress I drew up the other day)

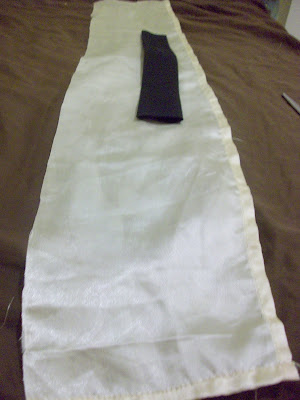
showing you how I cut the bottom half of the dress

cut two pieces for the bottom half, pin sides right side together and sew.

now I stuffed the bottom part up into the top (but don't make my mistake) right sides together (not wrong sides like me. what I usually do is over lap the fabric and pin every couple of inches trying to show you here.

After you sew your two pieces together you want to pin the top to make straight and even, then sew.

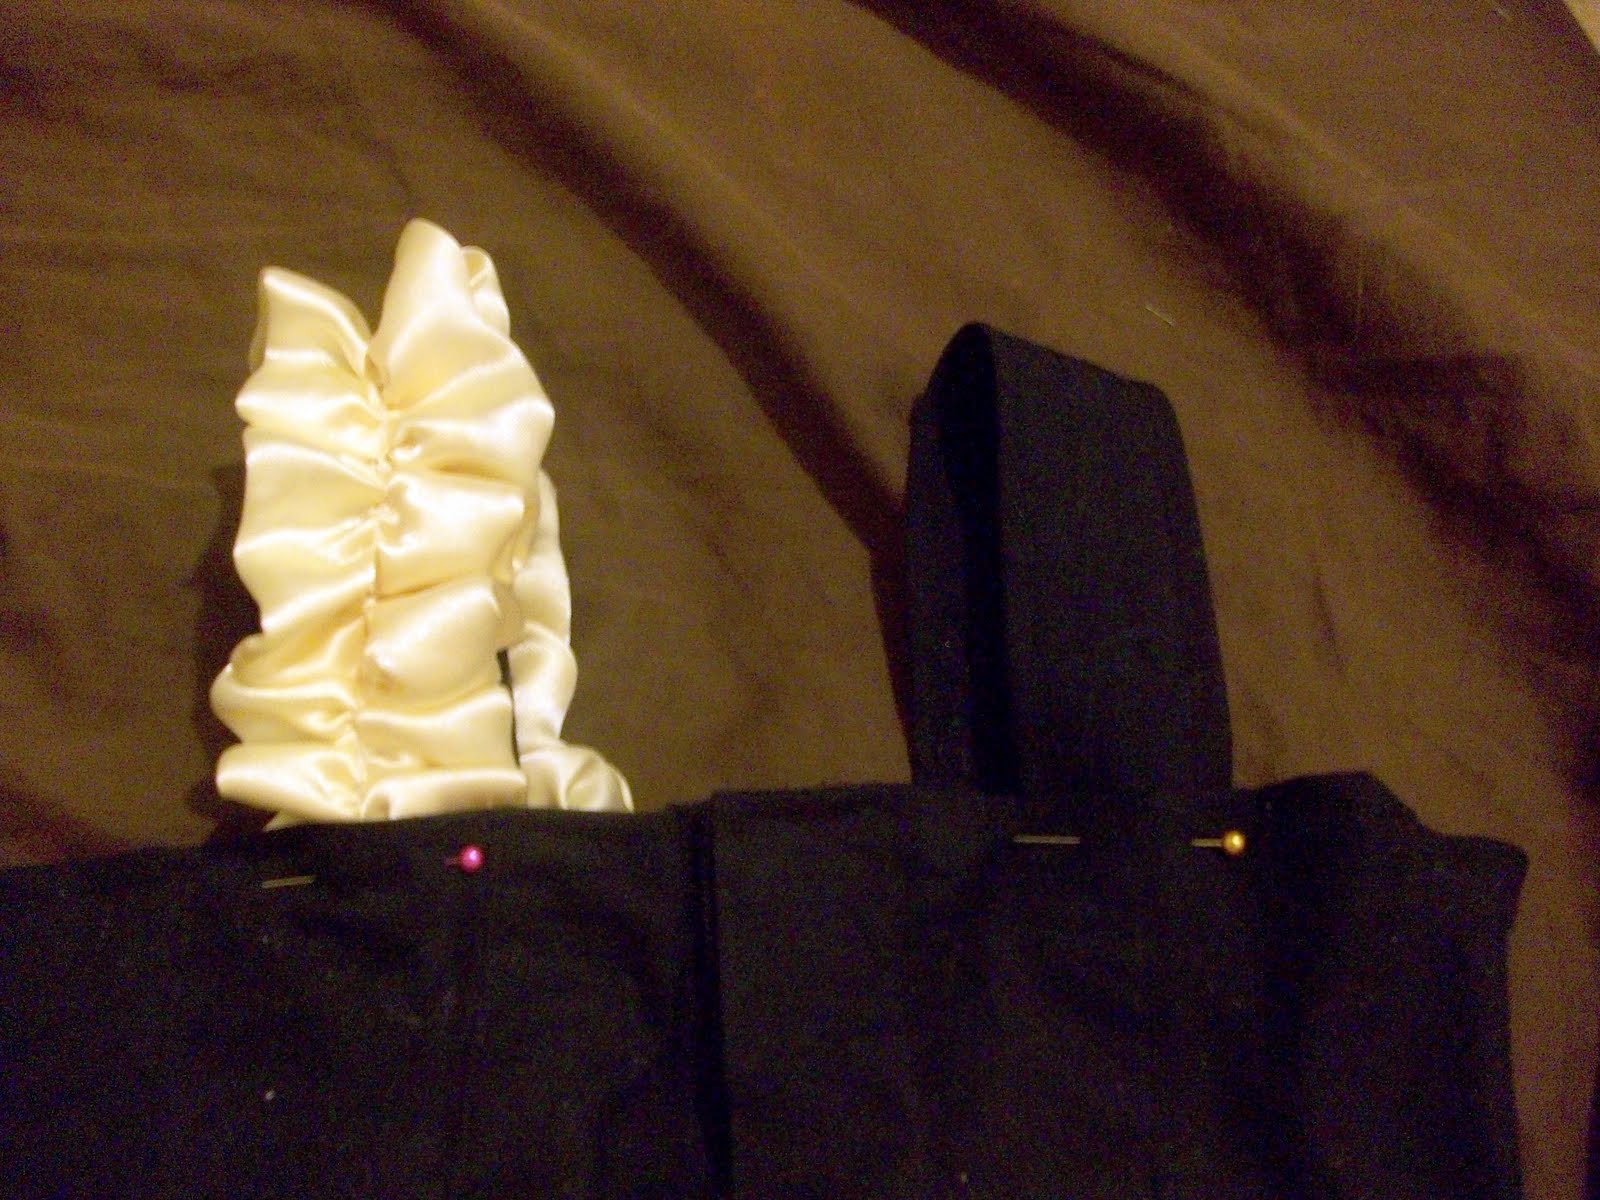
next for the straps you want to iron them down to make flat then, I went to my sewing machine and sewed four lines down each strap for something different using black thread.

after your strap is sewn grab a piece of your sheet or whatever you want to use. Making sure the fabric is twice as long as your strap. Fold right sides together, sew leaving a gap, then flip right side out.

then you want to take the piece twice as long as your strap and ruffle it up.

Pin to one of your straps and sew on
Pin and sew on your straps and your done with your dress..

it should look like this so far (needs to be ironed)
Next Blow dryer Hair Clip

Pattern

Cut two felt pieces from the pattern

Cut one felt piece with a slit and place your hair clip in set aside

I usually embroider everything on but I chose to use glue this time

place some glue on to the top of the blow dryer, then I took some embroider thread and placed it on the glue..

like so, then you want to glue your blow dryer piece on to your main felt piece (the pink)

as your gluing down the felt, place a piece of the black embroider thread under the blow dryer piece dab some glue and make your "cord". Then I dabbed some glue in the middle of the blow dryer piece and placed some white thread for the "high and low switch"

Now it's time to sew each piece together, I always start with the top piece so the knot is in between the piece,

Viola you made a blow dryer hair clip
For the Clutch I used my tutorial found HERE and added a big old bow..


I hope you enjoyed this tutorial as much as I enjoyed making it

Peace Love and Cupcakes
Amanda

Adorable!
ReplyDeleteLove this! You are so creative! :D
ReplyDelete<3MaryAnne
The dress is cute, but the bow is GENIUS! Awesome idea.
ReplyDeleteBeth from Sand to Pearl
Super cute!
ReplyDeleteCute dress!
ReplyDeleteVery cute and fun.
ReplyDeleteVery uptown! Love the dress and the model... Adorable!
ReplyDeleteYou are so talented! What an amazing little dress!
ReplyDeletesmiles!
So so cute! And the outfit is, too! Especially love the ruffled strap, that's a perfect detail. So clever of you.
ReplyDeletetotally uptown! SO cute!!
ReplyDeleteThanks for sharing
That is so uptown! Love it, and your little girl is the sweetest model.
ReplyDelete